
Building a Build Process: Source Code Management via Subversion and Apache on CentOS
This is part of a larger series in building a proper build process. For more information and additional series links, check out the introductory post.
Now we’re getting ready for some of the fun stuff. This time around, we’re going to install Apache (aka “httpd”) and Subversion (aka “svn”) and prepare to create a basic repository over https authentication.
Installing the Binaries
- Login to your CentOS VM as the root user.
- Open the Terminal (it can be found in
Applications > Accessories > Terminal) - Type the following in the terminal:
yum install mod_dav_svn subversion
This tells CentOS to use its package manager to pull down the subversion module for Apache and the subversion binaries itself. NOTE: A nice feature here is that CentOS knows that mod_dav_svn requires Apache, and so it’s going to install Apache for us as well. Very kind!
Creating Directories for Subversion
We need to give the subversion repositories a place to live, and we want to provide a common directory for subversion authentication.
In the terminal, type the following:
mkdir /var/www/svn
mkdir /var/www/svn/repositories
mkdir /var/www/svn/auth
This will create the Subversion folder that lives within Apache’s www directory.
Create Local User Accounts
These accounts are separate from operating system accounts – they’ll apply only to Apache via the configuration files we’ll be setting up soon. NOTE: These user accounts will apply across multiple repositories if we’d like them to; think of them as “subversion-wide” user accounts.
We’ll create two test users by running the following via the terminal:
htpasswd -csb /var/www/svn/auth/svn.htpasswd svnuser1 passw0rd1
htpasswd -sb /var/www/svn/auth/svn.htpasswd svnuser2 passw0rd2
NOTE: Leave off the -c parameter from the second line, or you’ll create a completely new file, erasing your svnuser1 account!
This creates the credentials for both users in the svn.htpasswd file. –c is the command to create a new file, –s forces SHA encryption of the password, and –b lets us pass the password via the command line (otherwise, it would have prompted us one at a time).
Creating our First Repository
We’ll create a repository called TestProjectRepo under our repositories directory that we’ve created by running the following on the terminal:
svnadmin create /var/www/svn/repositories/TestProjectRepo
That’s it! We’ve created the repository. Pretty simple, huh?
Granting Apache Ownership of the Repository Folder
Apache installs its own user account when setting itself up. The user, of course, is “apache”, and a group called “apache” now exists as well.
Run the following command in the terminal to grant apache the access it needs:
chown -R apache:apache /var/www/svn/repositories/TestProjectRepo
Editing the Apache Configuration to View our Repository
First, we’ll need to create configuration file. To do this by creating and opening a blank file, type the following into your terminal:
gedit /etc/httpd/conf.d/svn.conf
This brings up gedit, a nice graphical text editor (Nerd note: I can feel the Linux pros glaring at me for not suggesting that we use “vi”.)
Enter the following into the text file:
<Location /svn>
    DAV svn
    SVNListParentPath on
    SVNParentPath /var/www/svn/repositories/

    AuthType Basic
    AuthName “TestProject Repository Site”
    AuthUserFile /var/www/svn/auth/svn.htpasswd
    Require valid-user
</Location>
Save the file. This text does the following:
<Location /svn>: Tells apache that off of the main URL, the virtual directory will be “/svn”. (so if apache is hosting a web site atwww.myreposite.com, our app will be located atwww.myreposite.com/svn)DAV svn: Tells apache we’ll be using themod_dav_svnmoduleSVNListParentPath on: the location of our repositories on the actual serverAuthType Basic: Configures basic authentication (which is the type of auth that our basic file setup is using)AuthName “TestProject Repository Site”: Defines the Text that will show up when the user is prompted for a username and passwordAuthUserFile /var/www/svn/auth/svn.htpasswd: This is the reference to the file we created that holds the basic passwordsRequire valid-user: This states that for this directory, Apache will deny anyone who doesn’t login as a user that is listed in our auth file.
We need to restart the server for these changes to take effect. To do this, enter the following into the terminal:
/etc/init.d/httpd restart
Seeing it in Action
Since the default configuration for apache is to host web site’s on port 80, you should be able to point a web browser on another machine to your subversion server’s web site via its IP address and get the result.
I didn’t know what the IP address was for my subversion server, so I typed ifconfig into the terminal to get it. I saw that my inet addr for my connection eth0 is 10.0.0.15, and I know that the site is hosted on port 80 by default (which I don’t have to enter into my web browser because it knows this), and I know that the virtual directory is /svn, so I type the following into my web browser:
http://10.0.0.15/svn/ …and lo & behold, I’m greeted with a password prompt! I enter one of our pre-defined usernames and passwords, I’m greeted with the following in my web browser:
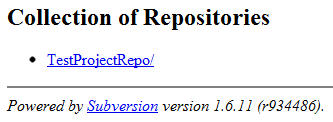
Great – I can see my repository!
Now, bear in mind, this is an empty repository, so clicking on it won’t give you the satisfaction of seeing any project files. But don’t worry, we’ll be taking care of that next.
Starting Apache Upon System Startup
For use multiple times, it will likely make sense to have Apache start up with the system.
On the Centos VM command line, run the following:
chkconfig httpd on
That’s it; the server will start at boot.
Feedback Welcome!
I’d love to hear any comments on this series. Find it useful? Think there’s a better way to implement the technique or something I should have mentioned? Please drop a line in the comments to help me improve the series!
Leave a comment