
Tutorial: An Automated reading list with Feedly and Azure Functions
I’ve been a fan of RSS feeds for a long time. I love curating a collection of knowledge that streams to me at my pace, and I consider feeds to be a fundamental piece of how I keep up with technology and stay fresh. I currently use Feedly and have been a happy pro user for years.
But something is missing. As much as I like reading, I also like sharing. So, I’m going to build a system that will share my reading list in an automated way so that it stays evergreen.
The Requirements
I think the requirements for this mini-project will be:
-
Only show my development-related feeds. I’ve got a ton of RSS feeds, and as much as I’m sure everyone would like to see my politics
 , we’ll want to filter the RSS feeds list to only those that would be relevant to developers.
 - Can continuously run with minimal intervention. I need this system to be pretty low maintenance. It can’t be held together with duct tape.
- Cost-effective. I don’t want to spend a ton of money on this.
Luckily, with the benefits of Azure Functions and APIs, I think we can make this work in a cost-effective way.
The Ingredients
My solution is going to make use of:
- The Feedly API. Feedly is kind enough to provide a developer API for access to your feeds (I think even for non-pro users?). This is what will give us access to our feeds.
- Azure Functions is a perfect fit for this. A small, light-weight, cost-effective, easily-deployable solution to interact with APIs. We’ll use functions to keep the Feedly auth token up to date (it needs to be refreshed), and to filter the OPML feed file to to the contents that we want.
- Azure Key Vault. Since we’re dealing with authorization tokens, I’m not just going to be dumping them any old place, even though it would probably be pretty fast to dump them plain-text into a private Azure storage blob. Safety first!
- Azure Storage Blobs. We’ll have the function post the current list to a storage blob, where we can expose its contents publicly and link to it directly from this static site.
- VS Code. This time around, I’m going to try to do everything from VS Code and the command line. Because why not?
Getting Started
Before we get started: I’m here to help! If the example is unclear, or something isn’t working for you, drop me a line in the comments and we’ll figure out a way to get it straightened out.
- Sign up for an Azure account. You can do it here if you don’t already have an account (I believe they provide 30 days free with roughly $200 in credit, which is pretty awesome.)
- Get a Feedly API key. You can obtain the key here, which will ask you to sign in, and then will provide you with your User ID and a link to your auth token & refresh token. Place these IDs and tokens in a notepad document or someplace temporary, or in a password manager.
- Install .NET Core SDK. We’ll be using .NET Core to develop our app. You can get it here. You can get it from https://dotnet.microsoft.com/.
- Install VSCode. This isn’t a requirement by any means. It’s just an editor, but it’s a mighty fine one and I suggest you familiarize yourself with it. You can get it at https://code.visualstudio.com/.
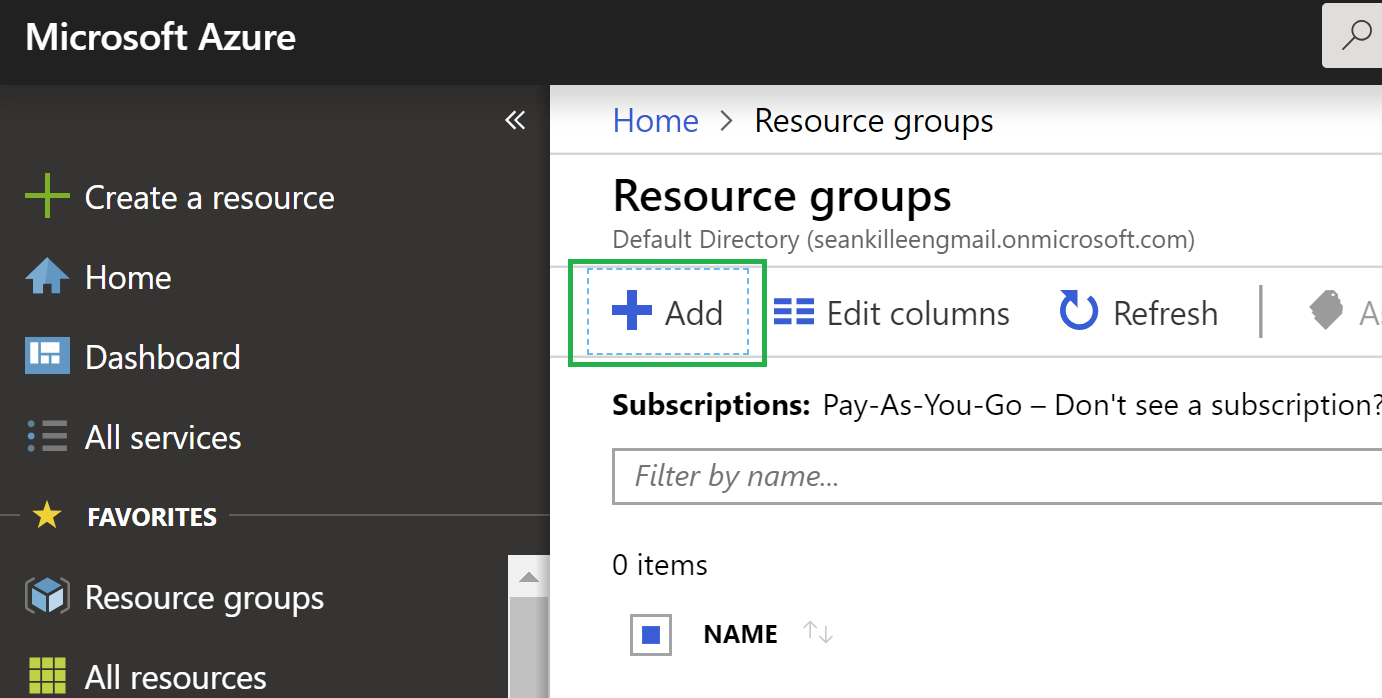
Create a Resource Group in Azure
- Log into your Azure Portal
- Click
Resource Groupson the left-hand side, and click “Create Resource Group”
- Enter the information for your resource group. Here, I’m using
sean-feedly-opml-export.
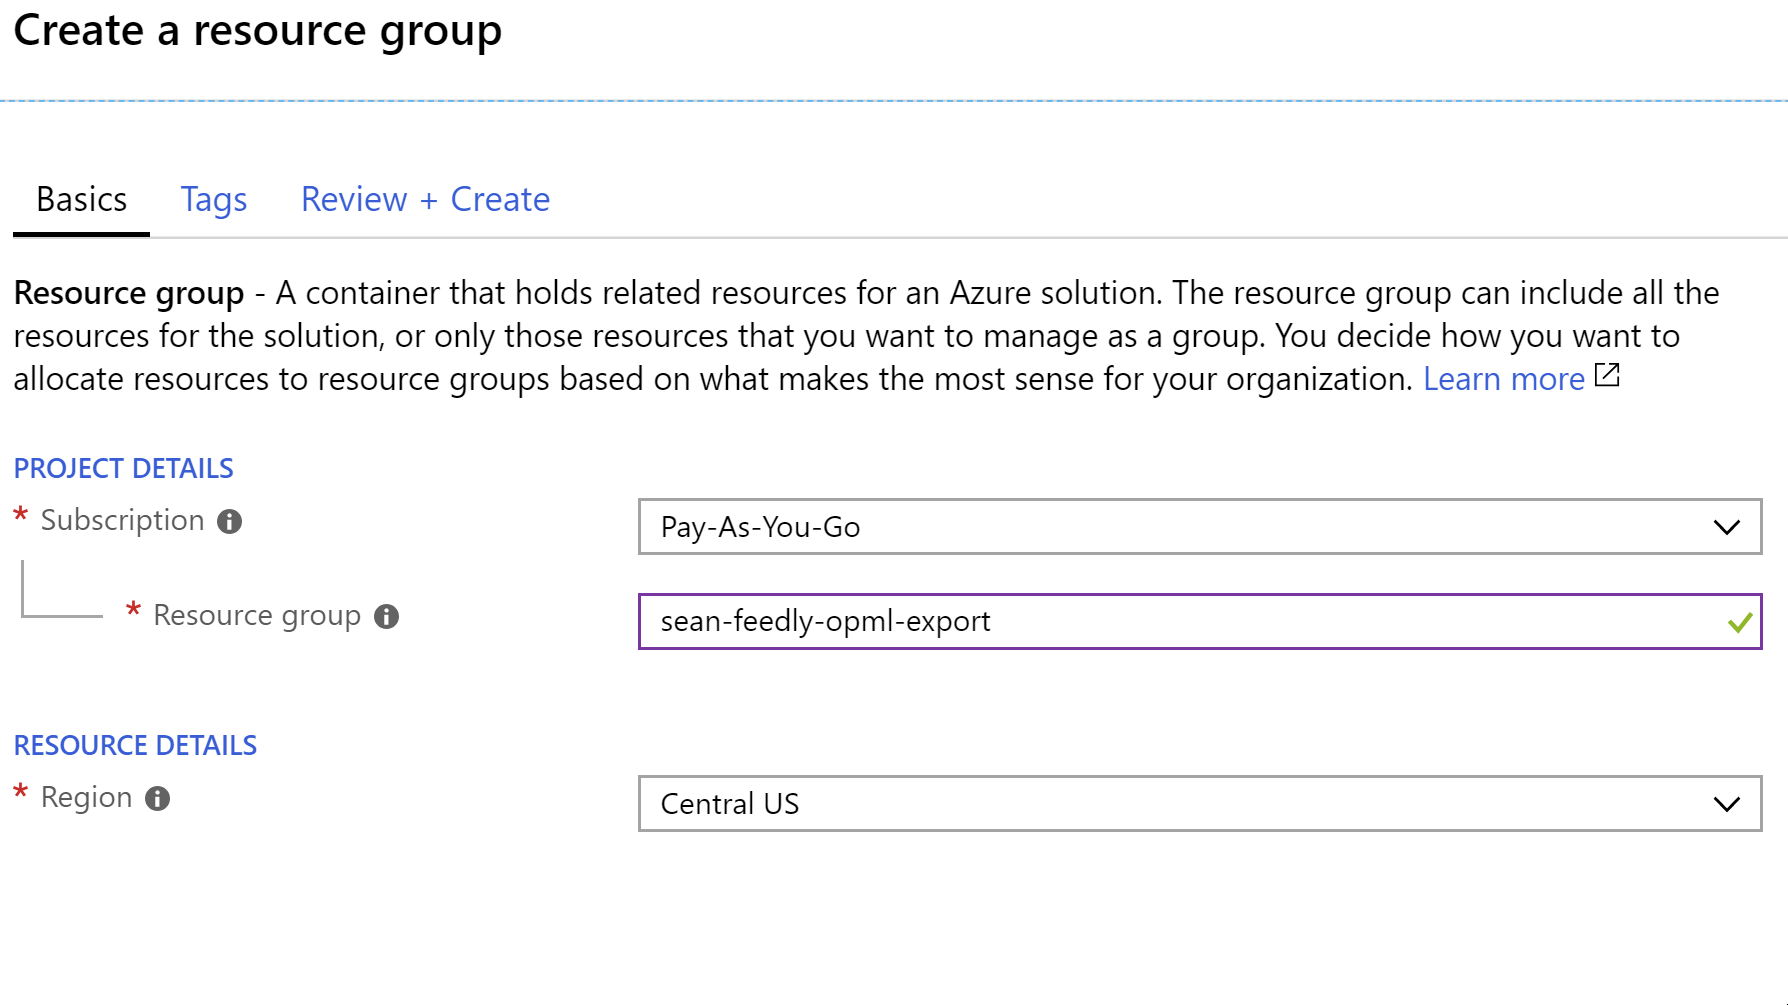
- Click the review and then create buttons to create the group.
Setting up the Azure Key Vault
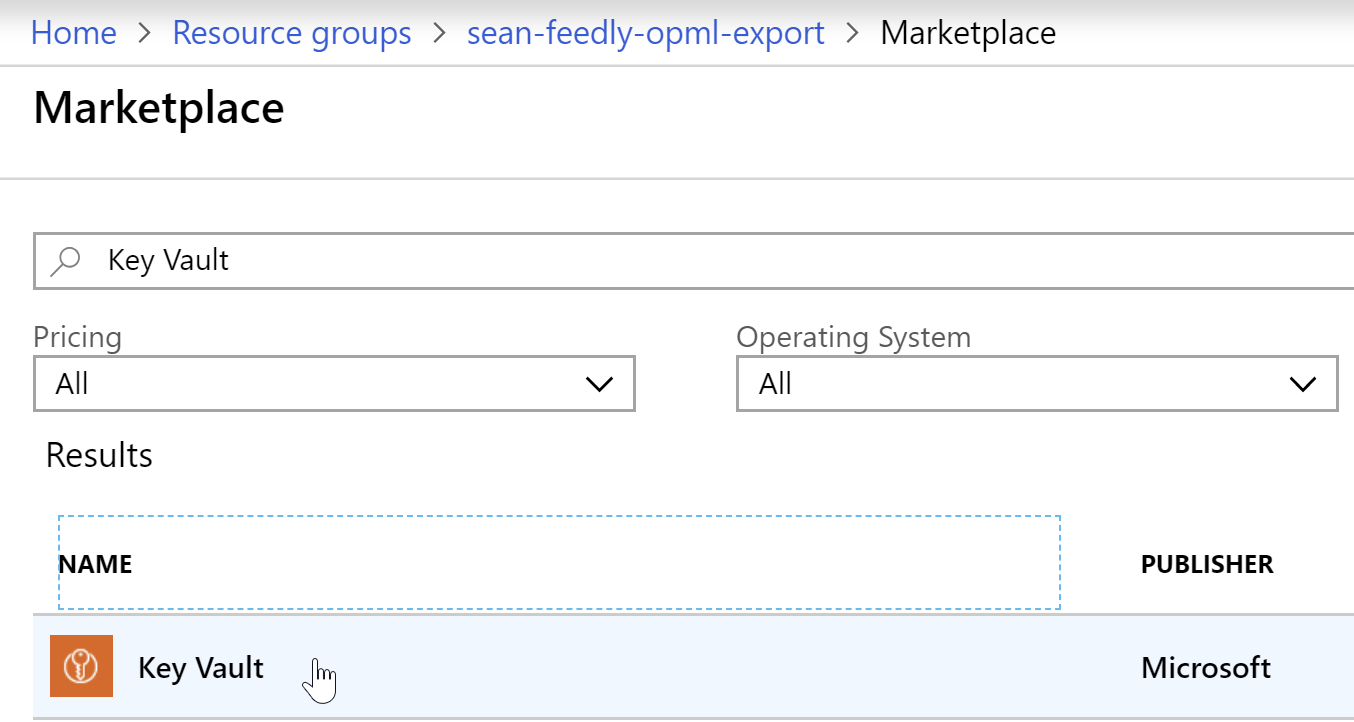
- Open the resource group you created, either by going to
Resource Groupson the left-hand menu or selecting “Go to resource group” when the success message appears upon creation. - Click “Add” to add a resource.
- Search for
Key Vault, and select the Azure Key Vault offering by Microsoft.
- In the blade that opens to the right, click “Create”.
- Give the key vault a name. I chose
feedly-export-keyvault. - For the
Resource Group, select the group you previously created. - The rest of the options (Standard pricing, principle, network access) can all remain in their default selections.
- Click
Createto create the key vault, and allow a little time for the deployment to complete
Add Your Keys to the Key Vault
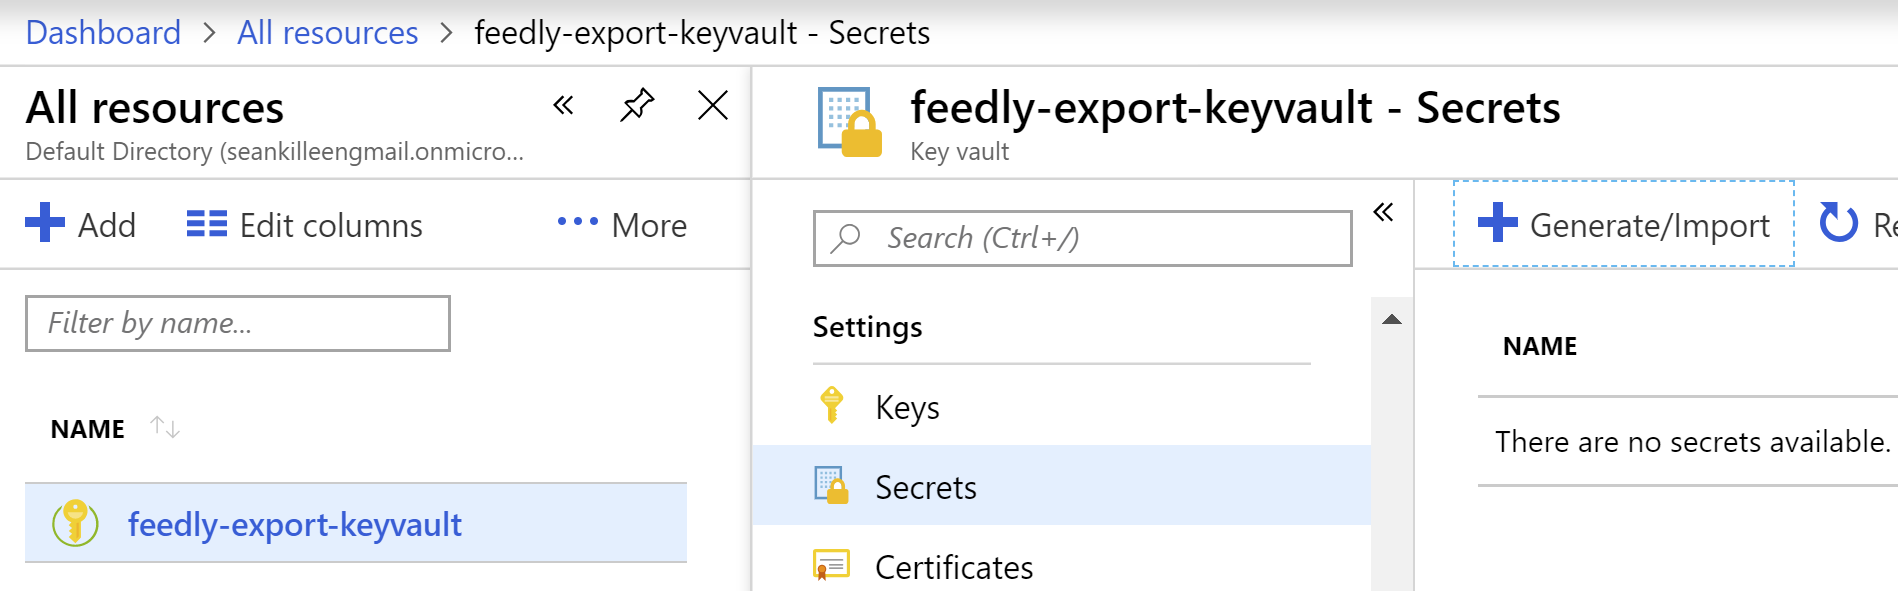
- Open your Key Vault resource by navigating to “All resources”, finding the key vault you created, and clicking on it.
- Under settings, click
Secrets. - When the
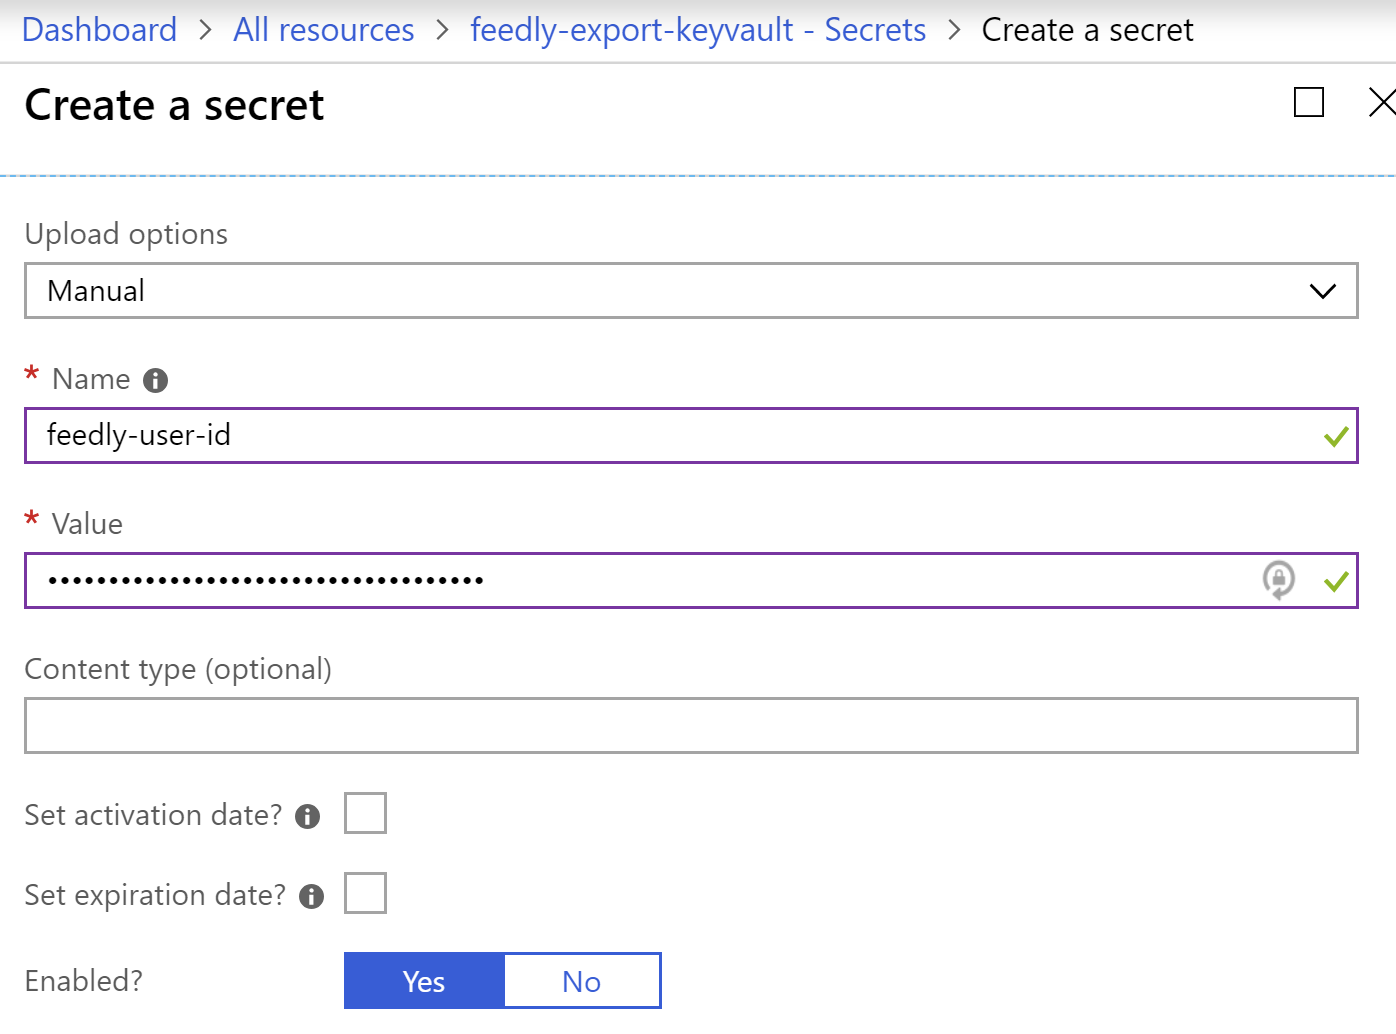
Secretsblade appears, clickGenerate/Import.
- Enter the name of the secret. First up, we’ll use
feedly-user-id. - Paste the user ID you previously generated, and then click
Create.
- Repeat the process for secrets that we’ll call
feedly-access-tokenandfeedly-refresh-token.
Awesome! Now you can delete that notepad doc you have lying around.
Setting up the Azure Function Project
You can create Azure Functions directly from the portal, but that bugs me because I want the benefits of source control, automated deployments, etc. – so, for the purposes of this project, I’m going to create a repository on GitHub. You can create one and follow along, or feel free to clone my repo.
These instructions assume that you’re creating all of the below within a repository that will be hosted on GitHub. If you have any questions about getting that piece set up, drop a line in the comments and I’ll be happy to try to assist.
Creating the Azure Functions Project
Getting Set up in VS Code
- Clone the new repository you created from GitHub
- Open the root of the repository in VS Code
- Open a terminal in VSCode via the
Terminalmenu or the keyboard shortcut. - Install the AzureFunctions extension
A quick sidebar: Why I love VS Code
Since I wasn’t using Visual Studio, I was prepared to use the command line to create the Azure Functions project, and wrote up a few sections on it. However, halfway through that, I discovered there’s an Azure Functions extension which makes the whole process quick and easy directly from within VS Code. Beautiful.
Creating an Azure Function project using the extension
- Create a new folder called
srcto hold our code. - Click the Azure Functions toolbar icon on the left-hand side, and then click to create a new project.
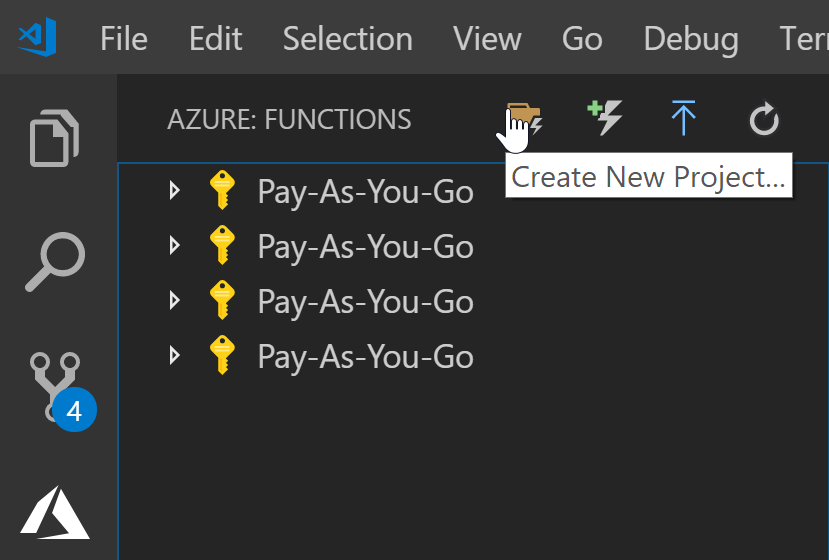
- For the project location, click
Browse...and select thesrcfolder as the location.

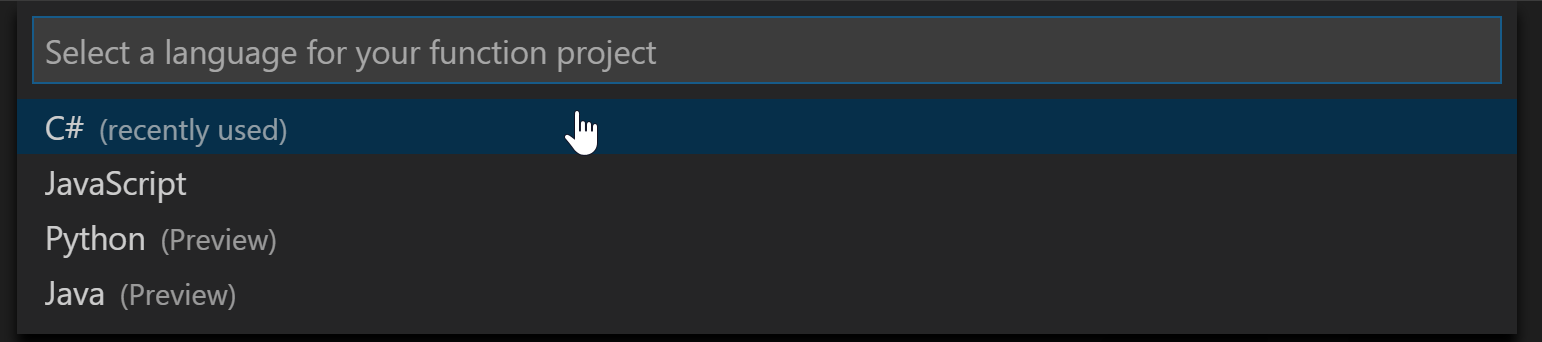
- A dialog pops up asking about the language. For this tutorial, we’re using C#.
- Next, we’ll choose a runtime. We’re going with
v2 (.NET Standard)for this tutorial.

We can see at this point that the project is named src, which probably isn’t what we’re looking for.
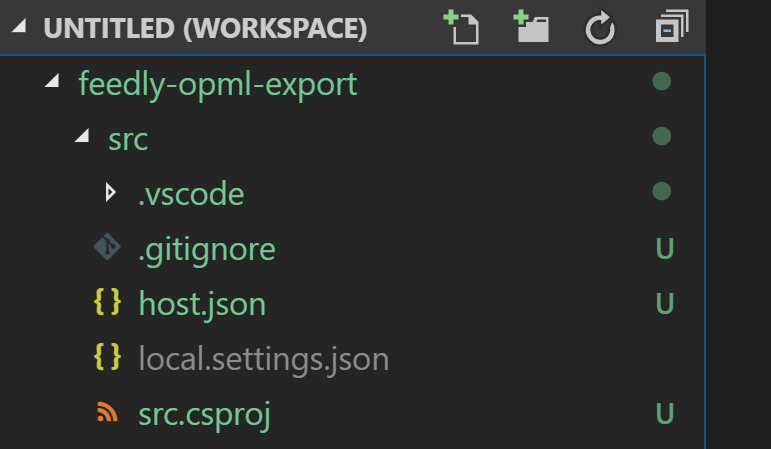
- Right-click the
src.csprojfilename and rename it toFeedlyOpmlExport.Functions.csproj.
Setting up a function to refresh the auth key
Our first function will be a timer-based function that will refresh the Feedly auth tokens using the Key Vault. The Feedly auth token expires every 2 days, but we’ll run our refresh every 6 hours just to be sure we’ve got some buffer.
Creating the Function
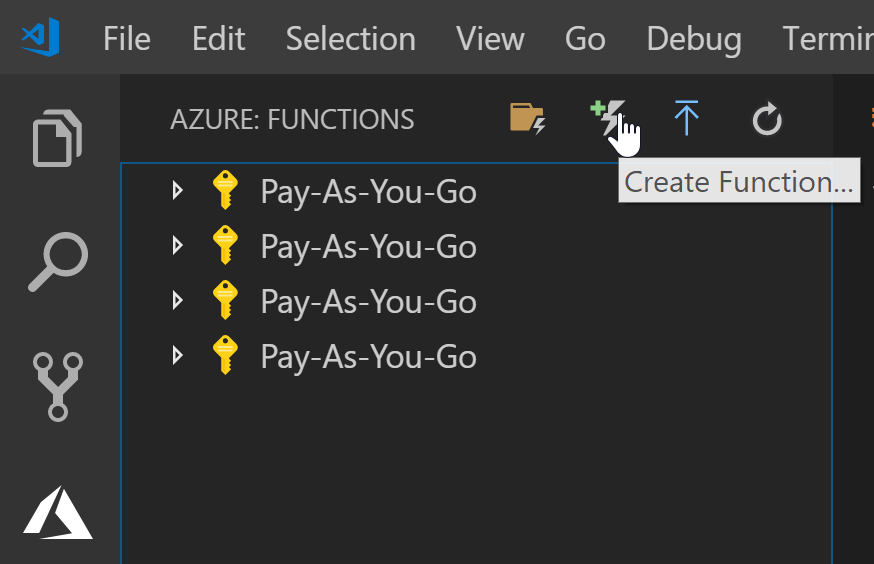
- Go to the extension again, but this time select
Create Function.
- Select your
srcfolder as the location. - You’ll see a prompt that you need to set a project language. Select
C#. - You’ll see a prompt that you need to set a project runtime. Select
v2. - When prompted for a template, use
TimerTrigger.

- When prompted for a name, use
RefreshFeedlyAuthToken. - When prompted for a namespace, use
FeedlyOpmlExport.Functions. - When prompted for the CRON expression, use
0 0 */6 * * *(Every 6 hours of every day)
At this point, the function will be created within your project.
Adding some Nuget Packages
I happen to know discovered along the way that we’ll need some nuget packages so you may want to install them. The commands to do this via the terminal are:
dotnet add package Microsoft.Azure.KeyVaultdotnet add package Microsoft.Azure.Services.AppAuthenticationdotnet add package Microsoft.Azure.WebJobs.Extensions.Storagedotnet add package Microsoft.NET.Sdk.Functions
Using Environment Variable Settings from the Function
Add these lines inside of the class definition for the function:
public static string refreshToken = System.Environment.GetEnvironmentVariable("feedly-refresh-token");
This will bind the variables to an environment variable, which we’ll connect to the key vault later.
Coding the Function
I created some POCOs to represent the request and what I need from the response:
public class FeedlyRefreshRequest
{
    private const string FEEDLY_CLIENT_ID = "feedlydev"; // hard-coded for users with Pro accounts

    public string refresh_token { get; }
    public string client_id =>  FEEDLY_CLIENT_ID;
    public string client_secret => FEEDLY_CLIENT_ID;
    public string grant_type => "refresh_token";

    public FeedlyRefreshRequest(string refreshToken)
    {
        refresh_token = refreshToken;
    }
}

public class FeedlyRefreshResponse
{
    public string access_token { get; set; }
}
I created then created a FeedlyManager.cs:
public static class FeedlyManager
{
    private const string FEEDLY_BASE_URL = "https://cloud.feedly.com/v3/";

    // We for now we're assuming we're passing in an access token. We'll get to that in a second.
    public static async Task<FeedlyRefreshResponse> RefreshFeedlyAccessToken(string accessToken, ILogger log, string refreshToken)
    {
        var client = CreateFeedlyHttpClient(accessToken);

        var request = new FeedlyRefreshRequest(refreshToken);
        var response = await client.PostAsJsonAsync("auth/token", request);

        if (!response.IsSuccessStatusCode)
        {
            var errorContent = await response.Content.ReadAsStringAsync();
            log.LogWarning($"Response failed. Status {response.StatusCode}, Reason {response.ReasonPhrase}");
            log.LogWarning($"Error content: {errorContent}");
        }

        response.EnsureSuccessStatusCode(); // Will ensure it blows up if the response isn't a success.

        return JsonConvert.DeserializeObject<FeedlyRefreshResponse>(await response.Content.ReadAsStringAsync());
    }

    private static HttpClient CreateFeedlyHttpClient(string accessToken)
    {
        var client = new HttpClient { BaseAddress = new Uri(FEEDLY_BASE_URL) };
        client.DefaultRequestHeaders.Authorization = new AuthenticationHeaderValue("Bearer", accessToken);
        return client;
    }
}
Now that we have the ability to talk to Feedly, we’ll need to get it an actual access token via the key vault. For this, I create a KeyVaultManager because I’m real good with names like that.
public static class KeyVaultManager
{
    // You'll change these depending on what yours is called; or, you can extract them into settings.
    private const string KEY_VAULT_BASE_URL = "https://feedly-export-keyvault.vault.azure.net";
    private const string ACCESS_TOKEN_KEY_NAME = "feedly-access-token";

    // we'll always just have one, because functions are short-lived.
    private static KeyVaultClient theClient = CreateKeyVaultClient();

    public static async Task<string> GetFeedlyAccessToken()
    {
        var accessToken = await theClient.GetSecretAsync(KEY_VAULT_BASE_URL, ACCESS_TOKEN_KEY_NAME, CancellationToken.None);
        return accessToken.Value;
    }

    private static KeyVaultClient CreateKeyVaultClient()
    {
        // Ed. Note: I'm still amazed that this is all I have to do to allow secure access to the key vault from my app.
        var azureServiceTokenProvider = new AzureServiceTokenProvider();
        var authenticationCallback = new KeyVaultClient.AuthenticationCallback(azureServiceTokenProvider.KeyVaultTokenCallback);

        return new KeyVaultClient(authenticationCallback);
    }

    public static async Task UpdateFeedlyAccessToken(string feedlyResponseAccessToken)
    {
        await theClient.SetSecretAsync(KEY_VAULT_BASE_URL, ACCESS_TOKEN_KEY_NAME, feedlyResponseAccessToken);
    }
}
Then, we can put it all together in our function definition:
// Ed. Note: I leave a lot of logging out here for brevity.
public static class RefreshFeedlyAuthToken
{
    // These will be read from a settings file, or environment variables, which in production will point to the key vault.
    private static readonly string userId = Environment.GetEnvironmentVariable("feedly-user-id");
    private static readonly string refreshToken = Environment.GetEnvironmentVariable("feedly-refresh-token");

    [FunctionName("RefreshFeedlyAuthToken")]
    public static async Task Run([TimerTrigger("0 0 */6 * * *")]TimerInfo myTimer, ILogger log)
    {
        var accessToken = await KeyVaultManager.GetFeedlyAccessToken();

        var feedlyResponse = await FeedlyManager.RefreshFeedlyAccessToken(accessToken, log, refreshToken);

        await KeyVaultManager.UpdateFeedlyAccessToken(feedlyResponse.access_token);
    }
}
Setting up a function to extract the OPML
We’ll add a method to our FeedlyManager:
public static async Task<string> GetOpmlContents(string accessToken)
{
    var client = CreateFeedlyHttpClient(accessToken);

    // this returns a string of the actual file contents.
    var response = await client.GetAsync("opml");
    response.EnsureSuccessStatusCode();

    return await response.Content.ReadAsStringAsync();
}
Then, I create a new ExtractFeelyOpml Azure function:
// Ed. Note: Logging and the XML filtering/labeling classes omitted for brevity.
// See the link to the repo for the full source.

public static class ExtractFeedlyOPML
{
    [FunctionName("ExtractFeedlyOPML")]
    public static async Task Run(
        [TimerTrigger("0 0 5 * * *")]TimerInfo myTimer
        , ILogger log
        , [Blob("opml-file/SeanKilleenBlogs.opml", FileAccess.Write)] Stream blobOutput)
    {
        var accessToken = await KeyVaultManager.GetFeedlyAccessToken();
        var opmlXml = await FeedlyManager.GetOpmlContents(accessToken);

        var categories = new List<string> { "development", "tech" }; // Because hard-coding strings never caused a problem before. ;)
        var filteredDoc = OpmlFilterer.FilterToCategories(opmlXml, categories);

        var filterAndLabeledDoc = OpmlLabeler.LabelOpmlFile(filteredDoc);

        var thing = Encoding.Default.GetBytes(filterAndLabeledDoc);
        await blobOutput.WriteAsync(thing, 0, thing.Length);
    }
}
Creating the Function Project in Azure
- Open your Azure portal and go to
all resources. - Click “Add” and search for “Function”. Select
Function Appand clickCreate. - Add a name for the function app.
- Choose the resource group that we created earlier.
- Create a new storage account to be used by the app.
- Click to create the function app.
Allow a bit of time for the function app to finish creation.
Setting up Deployment for the Functions project
OK, so we have a Function App, but how do we connect that with our GitHub repo where all our work is actually stored?
- Open the function app in the Azure portal
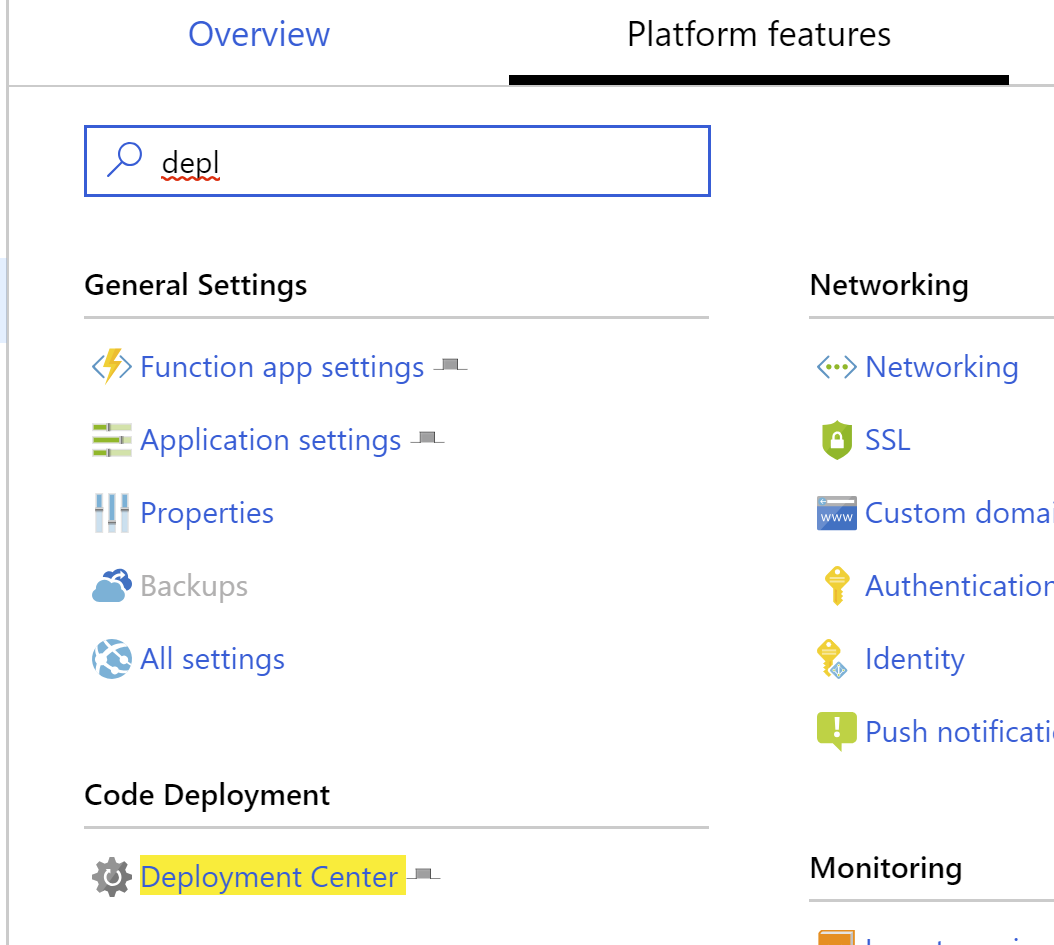
- Under the
Platform Featurestab, clickDeployment Center.
- When the deployment center appears, select
GitHubas the source. - Select your organization, the repo we created, and the
masterbranch. - Complete the wizard and allow some time for the app to deploy.
You now have an Azure Function running in production. Not too shabby!
Using the Key Vault to retrieve the sensitive data
So we have the app, but now we need to make sure we’re getting the right data out of the key vault. To do this, we’ll have to give our function app a managed identity, grant that identity access ot the Key Vault, and update the app’s settings to reference key vault locations.
Adding a System Managed Identity for the Function App
- In the Platform Features screen for the Function App, Choose
Identity - Chose the
System Assignedtab, chooseEnable, and Save.
You’ll see an Object ID field with a value in it.
Get the Secret Identifiers for the Secrets
The secret identifier is a URL that tells us how to access the secret.
- Open the Key Vault and click
Secrets. - For each secret, click on the secret and copy the
Secret Identifierinto a notepad document so you’ll have it for a later step.
Granting Access for the Function Identity
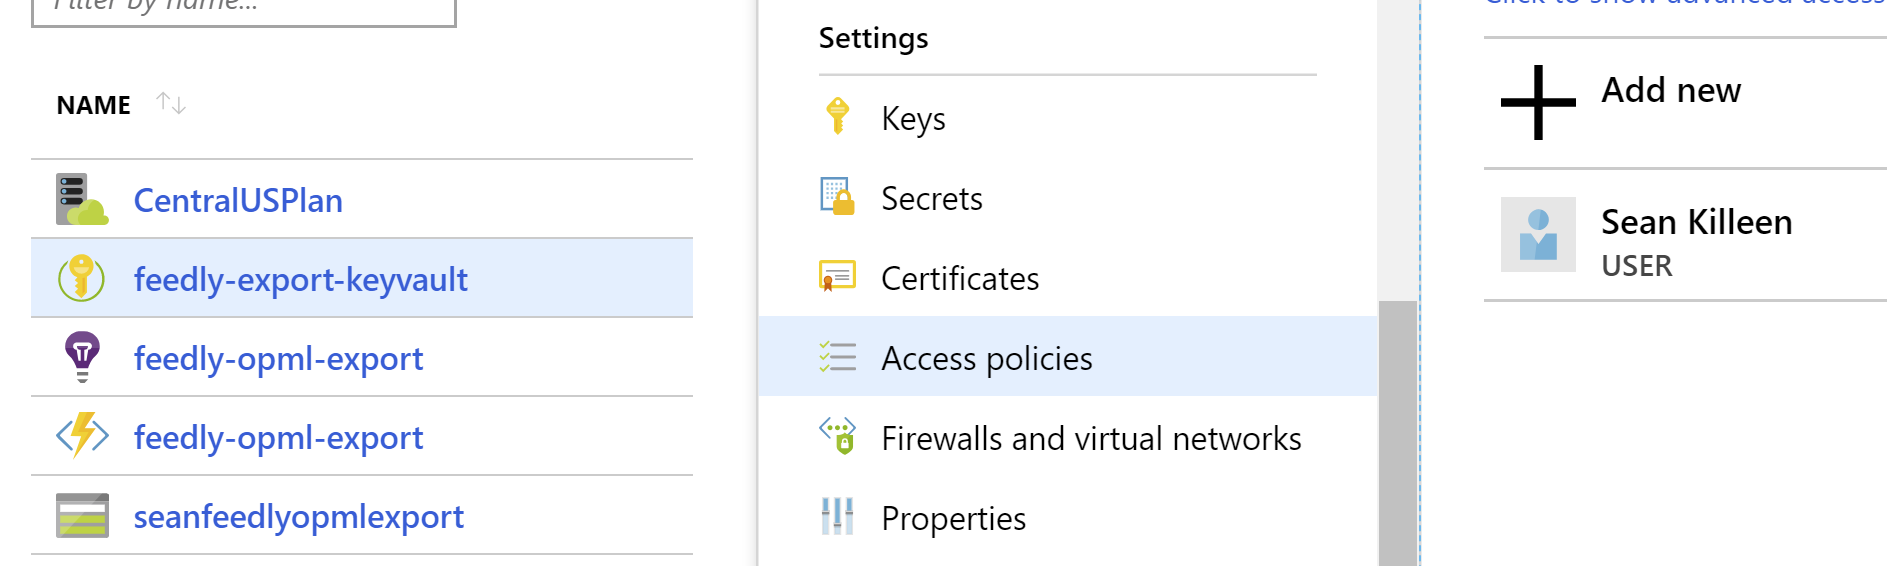
- Open the Key Vault settings in the Azure Portal
- Select
Access Policiesand click to add a new policy.
- For the Principal, select the
feedly-opml-exportapplication by searching for it.

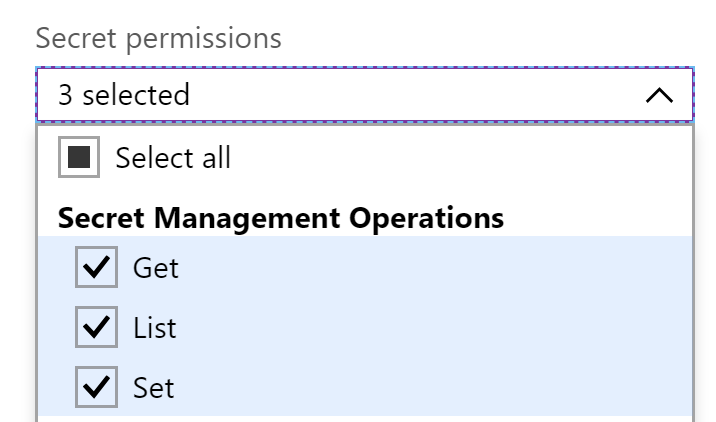
- Grant the application the authority to list, read, and set secrets.
- Save the access policy.
Update the function app’s settings to read from the key vault
Remember those Secret URIs you copied to notepad earlier? Great; time to put them to use.
First, you’ll want to re-format each of them so that they’re using the Key Vault formatting. This format is @Microsoft.KeyVault(SecretUri={Uri}).
So, if your URI was https://myvault.vault.azure.net/secrets/mysecret/ec96f02080254f109c51a1f14cdb1931, your formatted text should become @Microsoft.KeyVault(SecretUri=https://myvault.vault.azure.net/secrets/mysecret/ec96f02080254f109c51a1f14cdb1931).
Now that we have the right format, we’re ready to update our app settings with this.
- Open the Function App’s settings within the Azure Portal
- Add settings that correspond to the app settings we created (
feedly-user-id,feedly-access-token,feedly-refresh-token) - Enter the Key Vault formatted text for the app settings

- Save the settings
At this point, the app should read your app, which has been granted access to read from the key vault, should now be able to directly pull its settings from there.
Creating the Storage Blob to hold the outputted file
When you created the azure function project, you also created a storage account. Well, isn’t that convenient!
- Click on the storage account
- Click on
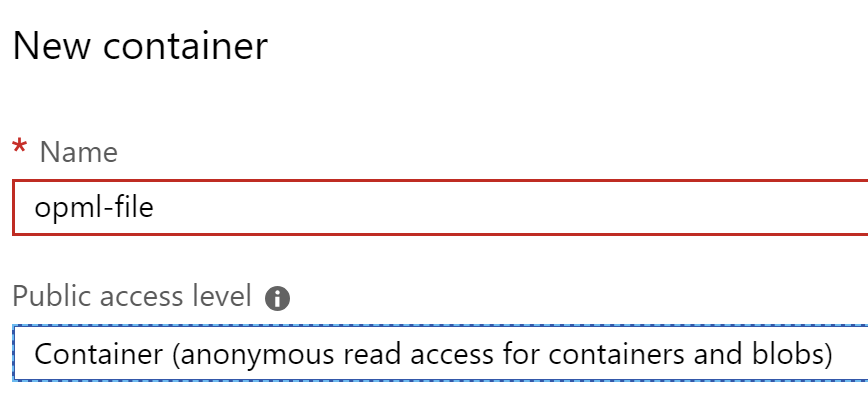
Blobs - Click the
+ Containerbutton to add a container - Name the container
opml-file. - Set the public access level to
Container, which will allow anonymous access to the container and the blobs in it. It’s fine in this case because this is the thing we want to publicly serve up.
Run the Function
At this point, you should be able to run the function and see a file created in the blob.
Adding the link to the content
- Click on the blob that was created when you ran the function.
- In the properties, copy the URL.
Now you’ve got the link to the file to paste wherever you want! I put mine on my Reading List page.
We did it!
Whew, that was a heck of a journey. We:
- Created an Azure function project
- Used environment variables for secrets
- Created a key vault
- Configured secure access to the key vault
- Wrote a function to make API calls and update the key vault
- Wrote a function to process a file from an API result
- Deployed the Function App to Azure right from GitHub
- Hooked a function to an Azure storage blob with a public URL
But What did it Cost?
Given that Azure Functions gives us our first million calls for free, and we’re only storing a tiny text file, I think I’ll be charged roughly $.01 per month for this tech. I think I’m willing to shell out $.12/year for this. ![]()
See the full source project in action!
You can find the source code for this project on GitHub – feel free to use it yourself! Pull requests welcome.
What do you think?
Did I miss something? Have you found a similar (or better?) way to do this? I’d love to hear your feedback on this or about different approaches. Sound off in the comments!
Leave a comment