Getting Started With PowerShell Core in Windows Terminal
I believe in scripting and automation, and I have come to love PowerShell for its eloquence, especially in a Windows environment.
PowerShell Core really takes this to the next level. It is what PowerShell will be going forward. It is cross-platform (works on Windows, Mac, Linux), and is open-sourced (something I particularly love).
So, I wanted to work it into my Windows Terminal installation and make sure I’m using it by default so I can get used to any differences. Here’s how I did it!
- I use the Chocolatey package manager, so I installed windows terminal via
choco install windows-terminal. - I installed PowerShell Core by running
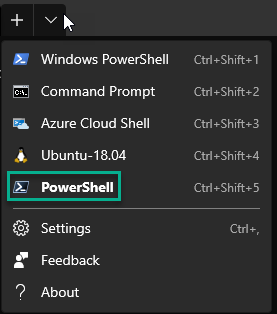
choco install powershell-core. - I opened Windows Terminal and check the list of shells. Great, PowerShell Core is in there!

But, it’s not yet my default. Let’s fix that.
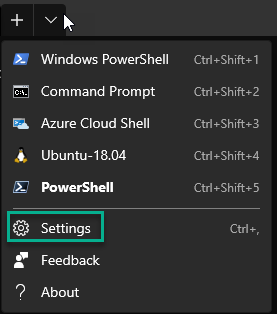
- Click the settings icon in the terminal, which opens a settings file (in VS code, in my case, because it’s a
.jsonfile.)

- Find the section that lists my profiles:

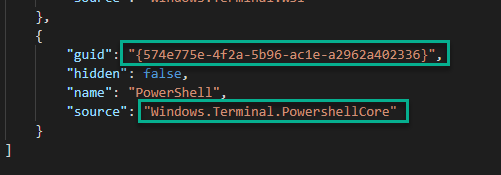
- Find the entry for
Windows.Terminal.PowershellCoreand copy the GUID

- Scroll up to the
defaultProfilesetting, and paste the GUID.

- Restart Windows Terminal, and bingo – my default shell is now PowerShell Core!

Happy shelling!

Leave a comment